
Uploading and Organising Media
Updated
Open Media Room to upload and manage files for your workspace. You can reuse these files in posts without uploading them again.
Files attached in the composer, imported from Google Drive or Canva, and sent through client upload links also appear here. Storage is shared across your organization's workspaces.
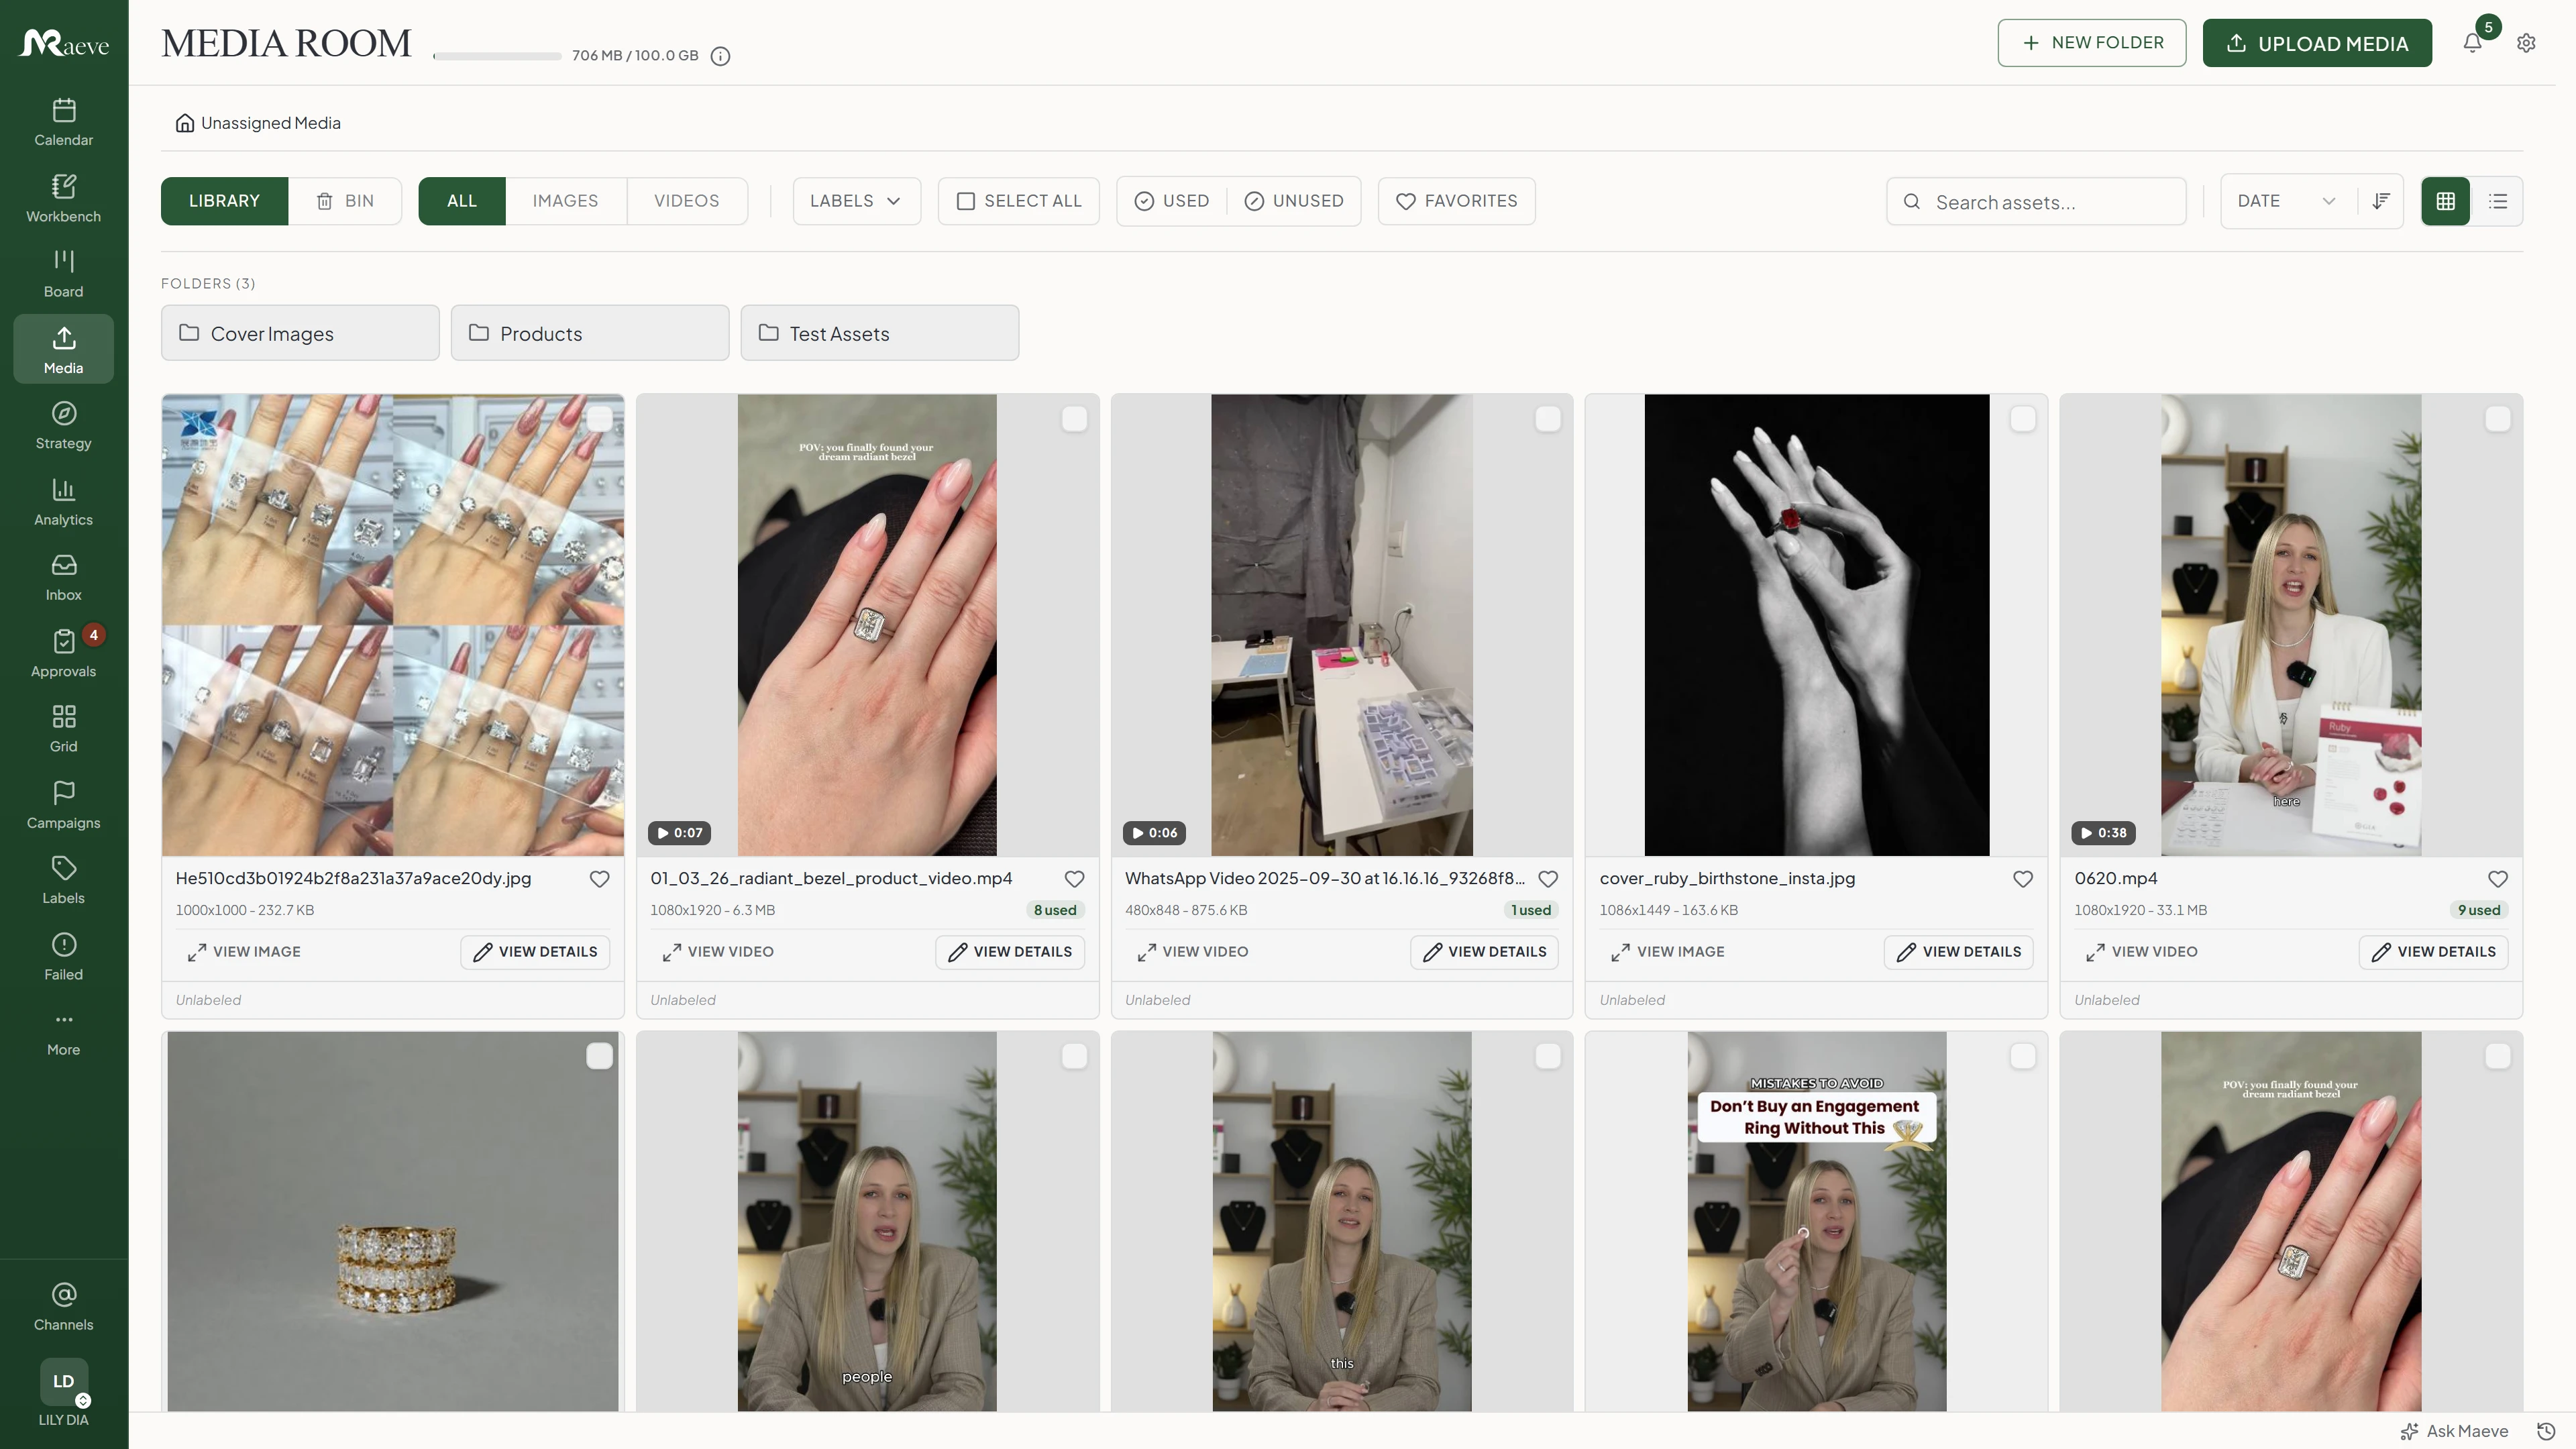
- 1Storage used against the organization's allowance, not this workspace's.
- 2Filter by type, by label, or by whether a file is used anywhere.
- 3How many places an asset is used, shown on the card.
Getting Files In
- Open Media Room and select Upload Media.
- Choose files from your device, or drag and drop them into the upload area.
- Wait for the uploads to finish, then find the files in the library.
You can also drag files onto the library or paste them onto the page. Google Drive imports are available in the library and composer. Import Canva designs from the composer.
Uploads and Google Drive imports from the Media Room go into the folder you have open. If no folder is selected, they go to the library's top level. Client uploads go into the destination folder set on the upload link.
| File Type | Accepted Formats | Maximum File Size |
|---|---|---|
| Image | JPG, PNG, GIF, WebP, AVIF, HEIC, HEIF | 50MB |
| Video | MP4, M4V, MOV | 512MB |
HEIC and HEIF images are converted to JPG during upload.

Add files to library
Drag & drop files here
or click to browse from your device
Images: 50MB · Videos: 512MB
Where files come from
- From the libraryUpload Media, or drag and drop, or paste onto the pageTop level
- Google DriveOffered in the library and in the composerTop level
- While writing a postAnything you attach, plus Canva, which is composer onlyTop level
- A client upload linkSent in by someone with the link and no accountThe folder you nominated
JPG, PNG, GIF, WebP, AVIF, HEIC and HEIF for images, MP4, M4V and MOV for video. HEIC and HEIF are turned into JPG on the way in.
Folders
- Select New Folder in the Media Room, enter a name, and create it.
- Select the files you want to organize.
- Use the folder action in the selection toolbar and choose the destination.
To create a subfolder, open a top-level folder and select New Subfolder. Folders support one level of subfolders.
Use the menu beside a folder to rename or delete it. Deleting a folder also removes its subfolders, but keeps their files at the library's top level.

Folders
- All media149
- Autumn campaign42
- Shoot day one18
- Shoot day two14
- Product shots96
- Brand assets11
Subfolders only support one level
Media inside will be moved to the root folder.
Where a file lives
A folder
One at a time, one level of nesting.
What a file is
A label
As many as you like, and the same labels you put on posts.
Labels
Open a file to edit its labels, then select Save Changes. You can assign several labels to one file. The same labels are available on posts.
To add labels to several files, select the files and use the label action in the selection toolbar. Bulk labeling adds labels. To remove a label, open the individual file.
Select Unlabeled to find files without labels. Selecting two labels shows files with both labels.
Finding Something
Use the search and filters together to narrow the library:
- Search matches filenames and alt text.
- Type shows images or videos.
- Labels shows files with the selected labels, or files without labels.
- Used and Unused filter by current media usage.
Filters appear in the sidebar on wide screens. When the sidebar is collapsed or the screen is narrower, use the filters above the library.
Sort by date, name, or size, then choose ascending or descending order. To find your largest files, sort by size in descending order.
Use the view toggle to switch between thumbnail grid and list. List view shows file details in columns for comparison.
What a Card Tells You
Hover over a card to see its filename, dimensions, file size, and usage count. Open the file to inspect its details and current usage.
The usage count includes post attachments, channel editions, cover images, and grid planner placements. One post can contribute several placements. List view shows the count in its own column.
Media details
 autumn-shoot-01.jpg1920x1440 · 3.1 MB4 usedUnusedshopfront-loop.mp41080x1920 · 84 MBlogo-stacked.png1200x1200 · 240 KB12 used
What the number counts
- Posts
- Channel editions
- Cover images
- Grid planner slots
It is also counted per workspace. A file can read as unused here and still be on a post in a workspace next door.
Working in Bulk
Select files to show the selection toolbar. Choose an action to move, label, download, archive, or delete the selection.
Keep bulk actions to 100 files or fewer. Downloads allow up to 50 files and 1GB in total. If your selection exceeds a limit, split it into smaller batches.

Bulk actions
Who gets what
- Create contentCreator and up
- DownloadAnyone, 50 at a time
- MoveManager and editor
- LabelManager and editor, adds only
- ArchiveManager and editor
- DeleteManager and editor
Selecting everything with Ctrl+A does not stop at the ceiling, so a selection over 100 is refused when you act on it rather than when you make it.
To start a post with selected files, choose Create content. The composer opens with those files attached. Check the selected channels and their media requirements before scheduling.
Managers and Editors can organize and remove media. Creators can upload files and use them in posts. Viewers can browse and download files.
Questions
Does media uploaded to a post go into the library?
Yes. Files attached in the composer appear in the workspace Media Room and can be reused in other posts.
What is the difference between a folder and a label?
A file belongs to one folder and can have several labels. Use a folder to group files in one location and labels to find related files across folders.
Where do files go if I do not put them in a folder?
Media Room uploads go into the open folder, or the top level if no folder is selected. Client uploads use the destination folder set on their link.
How do I find files I have not sorted yet?
Select Unlabeled to find files without labels. This does not indicate whether they have been placed in a folder.
Why can I not move or label anything?
You need Manager or Editor access to organize or remove media. Creators can upload and use files. Viewers can browse and download them.
How do I find the files taking up the most space?
Sort by size in descending order to put the largest files first.
Can I tell whether a file is used without opening it?
Yes. Hover over its card to see the usage count, or switch to list view. The count includes post attachments, channel editions, covers, and grid planner placements.
Can I start a post from the library?
Yes. Select your files and choose Create content. The composer opens with the selected media attached.